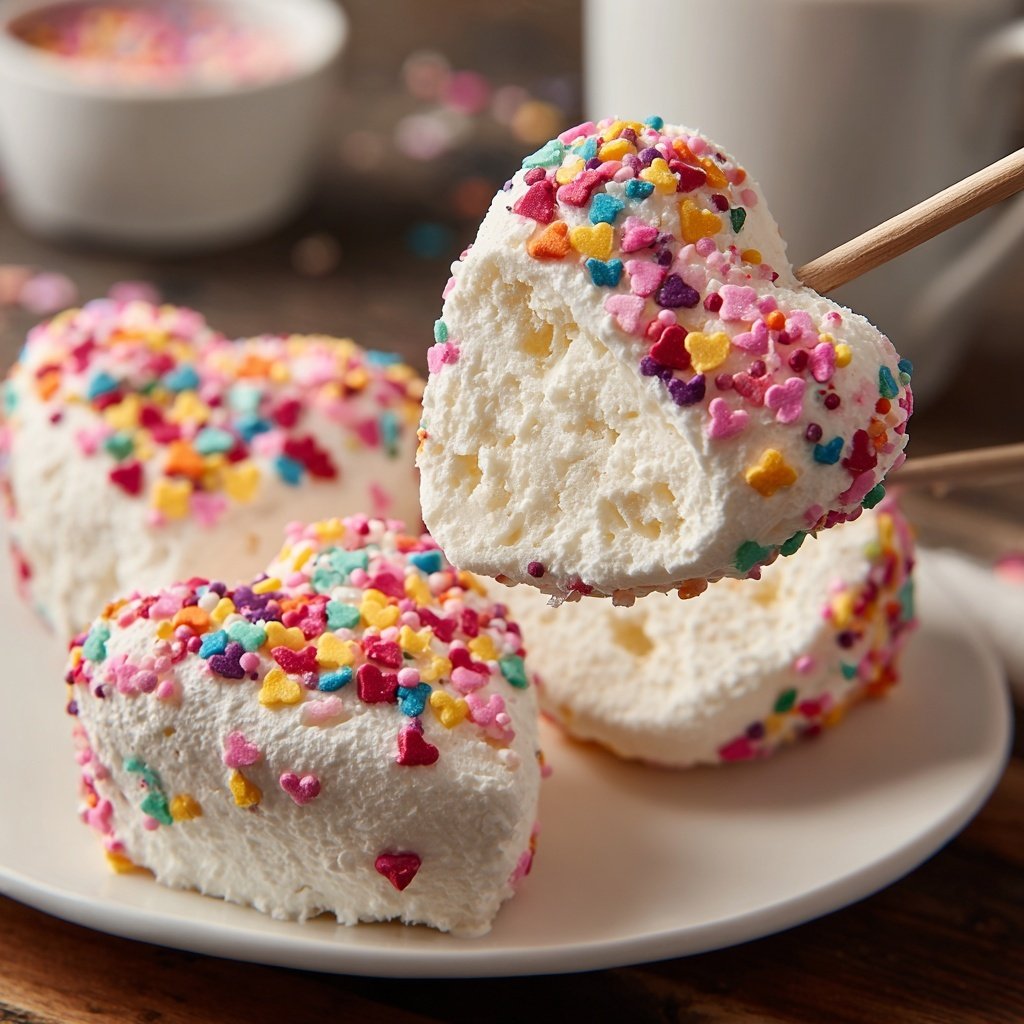
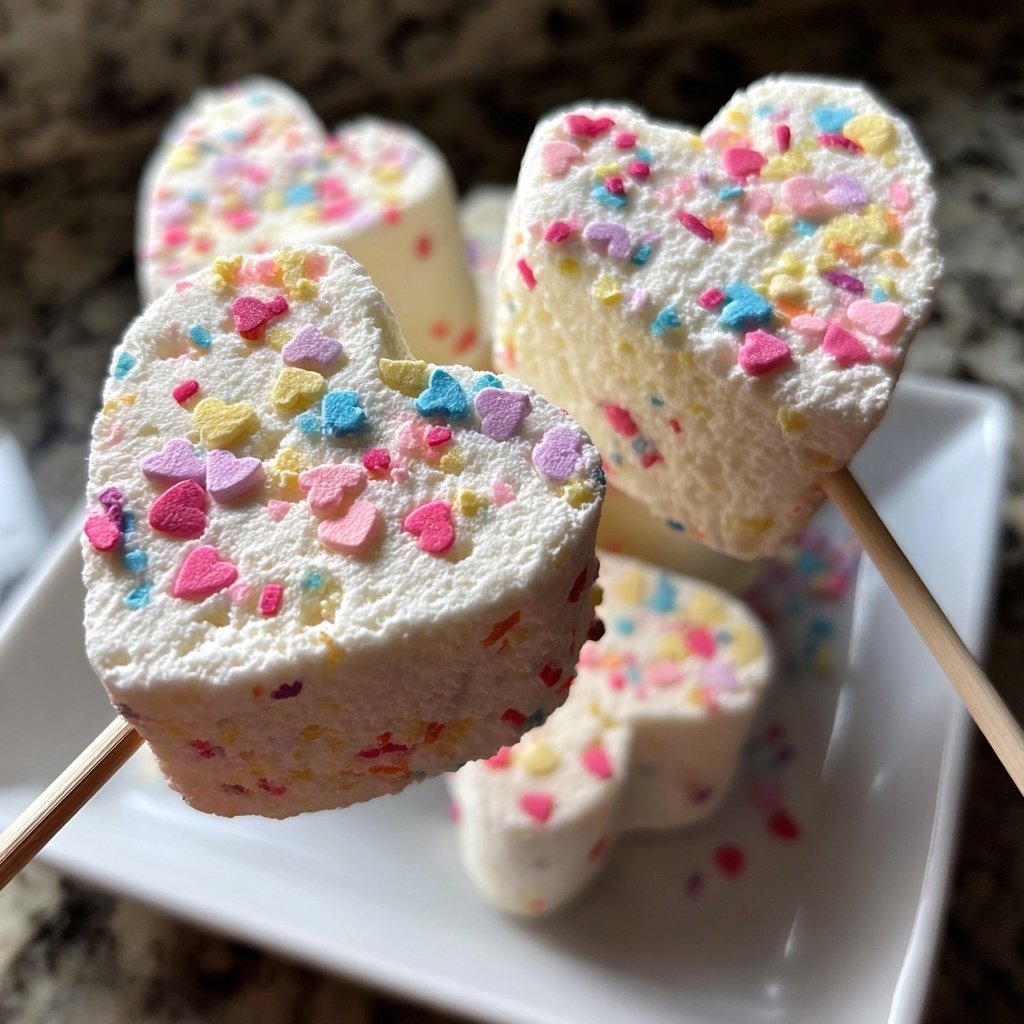
Valentine Marshmallow Pops
Highlighted under: Pastry Magic
I absolutely adore making Valentine Marshmallow Pops! They are the perfect sweet treat that combines a fun activity with a delightful outcome. I love how easy they are to prepare, and the creativity involved in decorating them makes it a perfect project for kids and adults alike. With a simple combination of melted chocolate and colorful sprinkles, you can whip together these charming pops in no time. Plus, they make for a beautiful gift for loved ones on Valentine's Day!
When I first attempted to make Valentine Marshmallow Pops, I was looking for a fun and engaging way to celebrate the holiday with my family. I discovered that using high-quality chocolate not only gives them a glossy finish but also enhances the flavor. It was such a joy to see everyone's creativity shine through as they decorated their pops with sprinkles and drizzles!
One tip I found invaluable was to lightly chill the marshmallows before dipping them in chocolate. This allowed the chocolate to set quickly, ensuring that the decorations stayed beautifully intact. It's an easy step that I now swear by whenever I make these adorable treats!
Why You Will Love This Recipe
- Fun and interactive for all ages
- Endless decoration possibilities with sprinkles and toppings
- Perfect for gifting or sharing with friends and family
Chocolate Choices
The type of chocolate you choose significantly affects the flavor and texture of your Valentine Marshmallow Pops. While I recommend using milk chocolate for a classic sweet taste, you can also experiment with dark or white chocolate for a different experience. If you're concerned about tempering chocolate, using high-quality chocolate chips can simplify the melting process since they are often designed for dipping and maintain a smoother consistency.
For those who want a richer flavor, try adding a pinch of salt to the melting chocolate. This contrast enhances the sweetness of the marshmallows, creating a more balanced treat. If you opt for a dairy-free version, dairy-free chocolate chips or bars work beautifully and will yield similar results. Just remember to check labels to avoid cross-contamination if allergies are a concern.
Creating Texture and Features
Achieving a smooth, shiny coating on your marshmallows is crucial for an appealing final look. Make sure to heat the chocolate gently, stirring frequently. If the chocolate becomes too thick or begins to seize, you can add a little more coconut oil or a splash of vegetable oil to reintroduce fluidity. The goal is to dip the marshmallows while the chocolate remains warm and fluid for even coverage.
Don't be afraid to get creative with your toppings! In addition to colorful sprinkles, consider adding crushed nuts, edible glitter, or small candies for unique textures and flavors. Changing up your toppings not only adds layers of flavor but also creates beautiful visual variations, perfect for gifting. If you're feeling adventurous, drizzle melted white chocolate over the finished pops for an elegant finish.
Storage and Serving Suggestions
Once your Valentine Marshmallow Pops are set, they can be stored in an airtight container at room temperature for up to a week. If you'd like to make them in advance for a party or event, they actually taste great a few days after making them. Just keep them in a cool, dry place away from direct sunlight to prevent the chocolate from melting or becoming sticky.
For serving, consider presenting them in a decorative jar or wrapping them individually in cellophane for a charming gift effect. If you want to add a personalized touch, you can create custom labels for the pops or attach a little note for recipients. This not only enhances the gift but also adds a loving personal flair that mirrors the spirit of Valentine's Day.
Ingredients
Gather the following ingredients to make your Valentine Marshmallow Pops:
Ingredients
- 12 large marshmallows
- 8 ounces of milk chocolate, chopped
- 1 cup of colorful sprinkles
- 12 lollipop sticks
- 1 tablespoon of coconut oil (optional)
Make sure to have fun while preparing your pops!
Instructions
Follow these simple steps to create your Valentine Marshmallow Pops:
Melt the Chocolate
In a microwave-safe bowl, combine the chopped milk chocolate and coconut oil. Heat in the microwave in 30-second intervals, stirring in between, until the chocolate is completely melted and smooth.
Prepare Marshmallows
Skewer each marshmallow with a lollipop stick, making sure to insert it about halfway through to stabilize during dipping.
Dip Marshmallows
Dip each marshmallow into the melted chocolate, making sure to coat it evenly. Allow any excess chocolate to drip off.
Decorate
Immediately roll the chocolate-coated marshmallow in colorful sprinkles before the chocolate sets.
Set and Serve
Place the decorated marshmallows in a styrofoam block or cup to keep them upright while they set. Once the chocolate has hardened, enjoy your Valentine Marshmallow Pops!
These delightful pops are sure to bring a smile!
Pro Tips
- Experiment with different chocolates, such as white or dark chocolate, for a variety of flavors. You can also customize your toppings to match different occasions.
Troubleshooting Common Issues
If your chocolate begins to harden before you finish dipping all the marshmallows, you can reheat it gently in the microwave. Just be careful to heat it in short bursts, stirring in between until you achieve a smooth consistency again. Conversely, if the chocolate is too hot and starts to clump, consider letting it sit for a minute to cool down before dipping.
Another common issue is uneven coating. If you find that your marshmallows are not being coated evenly, it might help to tilt the bowl slightly while dipping or use a spoon to aid in swirling the marshmallow through the chocolate. Ensuring that the chocolate is always at the right temperature is key to an even coat.
Making it a Family Activity
Engaging younger family members in making Valentine Marshmallow Pops is a fantastic way to spend quality time together. Allow the kids to choose their own sprinkles and toppings, fostering creativity. You can set up a decorating station with a variety of options to make it even more fun. Just keep an eye on younger children with the melted chocolate to ensure safe handling.
Another fun twist is to incorporate themes. For instance, you can make themed pops for different holidays by swapping out sprinkles and colors. By introducing different flavors of chocolate or using flavored marshmallows, you can evolve this recipe from simple to exciting, keeping it fresh for future celebrations.
Scaling the Recipe
If you're planning to make Valentine Marshmallow Pops for a large gathering or party, it's easy to scale up this recipe. Each batch uses 12 marshmallows, so simply multiply the ingredients accordingly. It's a good idea to keep the proportions the same for chocolate and sprinkles so that each pop stays balanced in flavor.
As you scale up, consider using a larger bowl for melting chocolate and dipping. Having more lollipop sticks ready and organizing your workspace efficiently will also help maintain a flow in production. Ensuring you have enough space to set the finished pops to dry will make the whole process smoother.
Questions About Recipes
→ Can I use different types of chocolate?
Absolutely! Feel free to use dark, white, or even flavored chocolates for unique tastes.
→ How do I store leftover Marshmallow Pops?
Store them in an airtight container at room temperature for up to a week.
→ Can I make these in advance?
Yes, you can prepare them a day ahead. Just keep them in a cool, dry place until you're ready to serve.
→ What can I use instead of sprinkles?
You can use crushed nuts, mini chocolate chips, or even edible glitter for a festive look.
Valentine Marshmallow Pops
What You'll Need
Ingredients
- 12 large marshmallows
- 8 ounces of milk chocolate, chopped
- 1 cup of colorful sprinkles
- 12 lollipop sticks
- 1 tablespoon of coconut oil (optional)
How-To Steps
In a microwave-safe bowl, combine the chopped milk chocolate and coconut oil. Heat in the microwave in 30-second intervals, stirring in between, until the chocolate is completely melted and smooth.
Skewer each marshmallow with a lollipop stick, making sure to insert it about halfway through to stabilize during dipping.
Dip each marshmallow into the melted chocolate, making sure to coat it evenly. Allow any excess chocolate to drip off.
Immediately roll the chocolate-coated marshmallow in colorful sprinkles before the chocolate sets.
Place the decorated marshmallows in a styrofoam block or cup to keep them upright while they set. Once the chocolate has hardened, enjoy your Valentine Marshmallow Pops!
Extra Tips
- Experiment with different chocolates, such as white or dark chocolate, for a variety of flavors. You can also customize your toppings to match different occasions.
Nutritional Breakdown (Per Serving)
- Calories: 150 kcal
- Total Fat: 7g
- Saturated Fat: 4g
- Cholesterol: 5mg
- Sodium: 20mg
- Total Carbohydrates: 22g
- Dietary Fiber: 0g
- Sugars: 18g
- Protein: 1g