No Knead Dutch Oven Bread
Highlighted under: Pastry Magic
I love baking bread, and this No Knead Dutch Oven Bread has become my go-to recipe. With minimal effort and no need for kneading, it produces a rustic loaf with a crisp crust and airy interior. The long fermentation time enhances the flavor, allowing me to enjoy fresh, homemade bread without being tied to the kitchen. Whether I'm making sandwiches or serving it alongside soup, this bread always impresses. I can't wait for you to try this easy, rewarding recipe—you'll be amazed at the results!
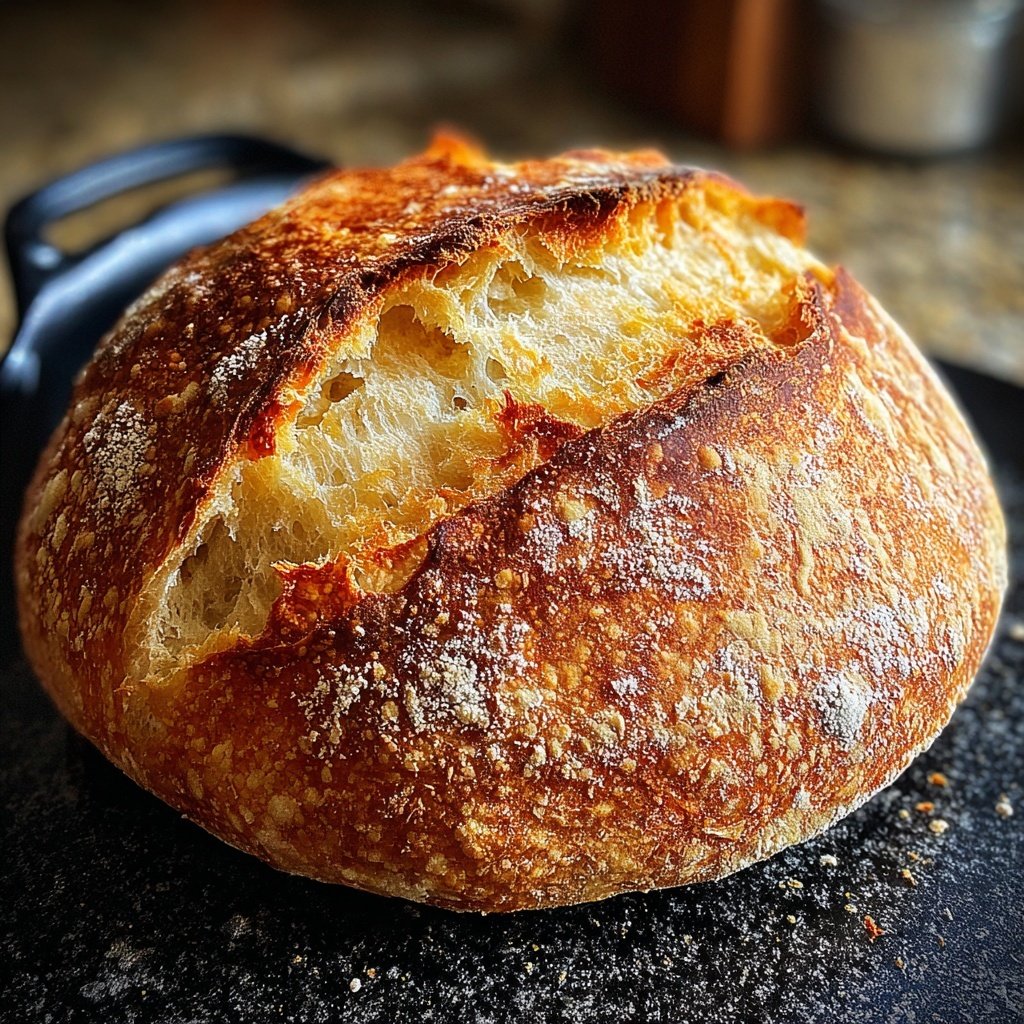
Baking this No Knead Dutch Oven Bread was an eye-opener for me. I remember the excitement I felt when I noticed how simple ingredients like flour, water, salt, and yeast could transform into something so delicious and satisfying. The magic happens with the long rise, which develops rich flavors and creates that beautiful texture.
The method of baking it in a Dutch oven mimics a professional bread oven, trapping moisture and ensuring a crust that’s crunchy on the outside while remaining soft and airy inside. It’s a foolproof technique I highly recommend for anyone, even if you’re new to bread baking!
Why You'll Love This Recipe
- Effortless preparation that yields amazing results
- Crispy crust with a soft, chewy interior
- Perfect for sandwiches, toasts, or enjoying with olive oil
Understanding the Dough
The dough for this No Knead Dutch Oven Bread is very wet and shaggy, which is essential for achieving that beautiful open crumb. This high hydration level allows for more steam during the baking process, helping to create a crusty exterior while keeping the interior soft and chewy. If you find the dough is too sticky to handle, you can slightly reduce the water next time, but you should aim to maintain a shaggy texture for the best results.
When you let the dough rise for 12 to 18 hours, you’re allowing the yeast to work its magic. The longer fermentation contributes to a more complex flavor profile and gives your bread its characteristic bubbly structure. If you're short on time, you can reduce the rise to around 8 hours but expect a slightly less flavorful result. Keep an eye on the dough's activity; if it has risen and shows bubbles, it’s ready for shaping.
Baking in a Dutch Oven
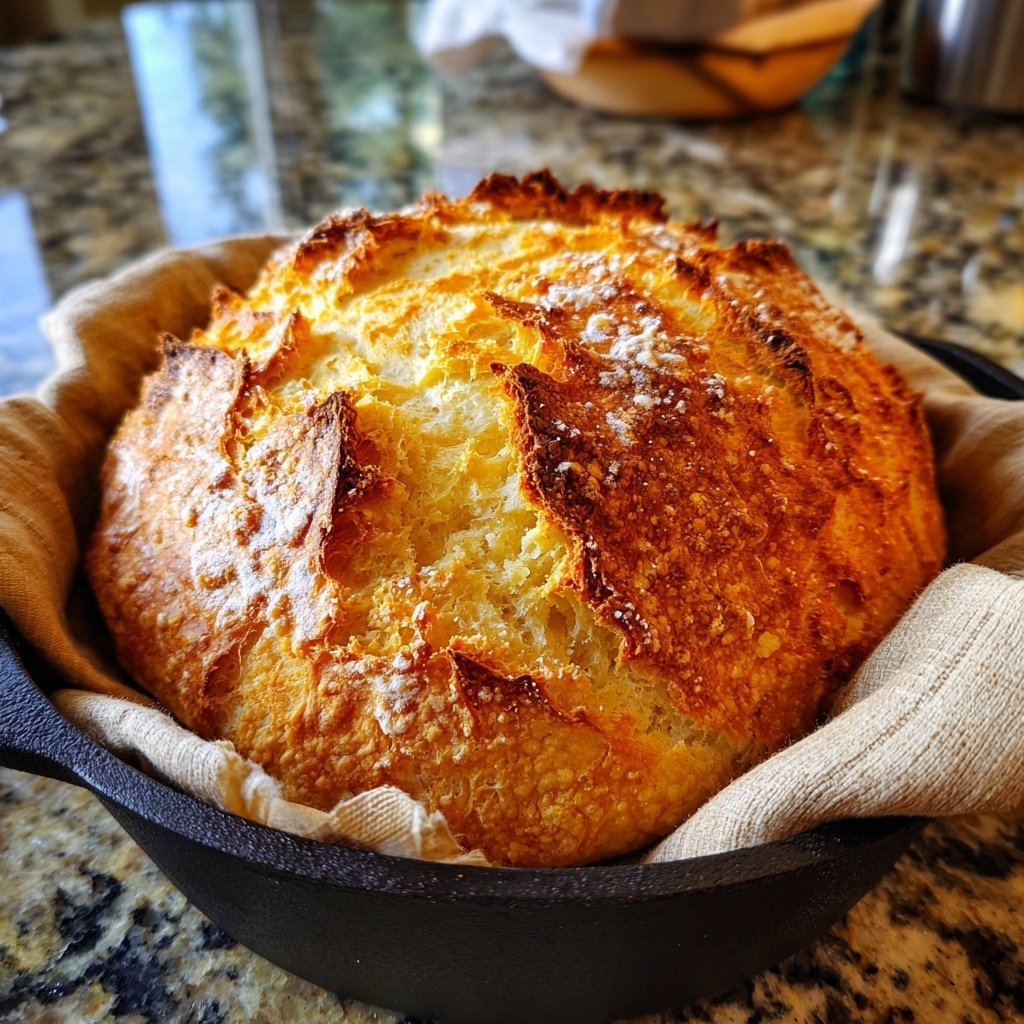
Preheating the Dutch oven is a crucial step that shouldn't be rushed. By placing the empty pot in the oven, you're ensuring that it reaches the right temperature—450°F (230°C)—to create steam around the dough when it’s added. This steam helps develop the crust while keeping the interior moist during the initial bake. If you’re using a cast iron Dutch oven, note that it retains heat well, so your bread will benefit from even cooking.
When you place the dough in the hot pot, it might seem intimidating, but if you use parchment paper, transferring the dough becomes much easier. Just lift the edges of the parchment to lower it into the pot. If you're worried about the bread sticking, you can lightly flour the parchment. Remember to keep the lid on for the first 30 minutes to trap the steam; it's a key factor in achieving that perfect crust.
Ingredients
Gather these ingredients to get started on your delicious bread.
For the Bread
- 3 cups all-purpose flour
- 1 1/4 teaspoons salt
- 1/2 teaspoon instant yeast
- 1 1/2 cups warm water
Make sure to measure your ingredients accurately for the best results.
Instructions
Follow these steps for successful No Knead Dutch Oven Bread.
Mix the Ingredients
In a large bowl, combine the flour, salt, and instant yeast. Stir together until well mixed. Add warm water and mix until a shaggy dough forms.
Let it Rise
Cover the bowl with plastic wrap or a kitchen towel and let it sit at room temperature for 12 to 18 hours. The dough should double in size and be bubbly.
Shape the Dough
Flour a clean countertop and turn the dough out onto it. With floured hands, shape the dough into a ball and let it rest for 15 minutes.
Preheat the Dutch Oven
Place your Dutch oven (with the lid) in the oven and preheat to 450°F (230°C).
Bake the Bread
Carefully place the dough into the hot Dutch oven, cover it, and bake for 30 minutes. Remove the lid and bake for an additional 15 minutes until golden brown.
Cool and Slice
Once baked, remove the bread from the pot and let it cool on a wire rack before slicing.
Enjoy your homemade bread fresh from the oven!
Pro Tips
- For extra flavor, consider adding herbs or cheese to the dough. Make sure to use a kitchen thermometer to check if your bread is fully baked
- it should register about 200°F (93°C) internally.
Storing and Serving
Once your bread has cooled completely, store it in a paper bag or wrapped in a clean kitchen towel rather than plastic. This helps maintain the bread's crustiness, as plastic can create moisture buildup and lead to a soggy exterior. If you need to keep it for more than a few days, consider slicing and freezing the bread in airtight bags; just make sure to let it cool thoroughly before freezing to preserve its texture.
This No Knead Dutch Oven Bread is incredibly versatile. I often serve it alongside soups or stews, or use it as a base for bruschetta with fresh tomatoes and basil. The chewy crust also makes it perfect for sandwiches—try pairing it with roast beef, sharp cheddar, and a touch of horseradish for a satisfying meal.
Variations and Substitutions
Feeling adventurous? You can add mix-ins to this basic recipe to create exciting variations. Chopped olives, herbs like rosemary or thyme, or even a handful of grated cheese can elevate the flavor. Just be mindful not to overload the dough, which can affect its ability to rise. Start with about 1/2 cup of mix-ins to see how it affects the texture.
If you're looking to lighten things up, you can substitute half of the all-purpose flour with whole wheat flour for added nutrition and a nuttier flavor. Keep in mind that whole wheat flour absorbs more water, so you may need to increase the hydration slightly—add a tablespoon of water at a time until you reach the desired dough consistency.
Questions About Recipes
→ Can I use whole wheat flour?
Yes, you can substitute up to half of the all-purpose flour with whole wheat flour for a nuttier flavor.
→ What if I forget to prepare it the night before?
You can still make it the same day; just let the dough rise for about 3-4 hours until it doubles in size.
→ Can I add ingredients like nuts or dried fruit?
Absolutely! Fold in your choice of add-ins during the mixing stage for added flavor and texture.
→ How should I store the bread?
Store the bread at room temperature in a paper bag. For longer storage, wrap it tightly and freeze.
No Knead Dutch Oven Bread
What You'll Need
For the Bread
- 3 cups all-purpose flour
- 1 1/4 teaspoons salt
- 1/2 teaspoon instant yeast
- 1 1/2 cups warm water
How-To Steps
In a large bowl, combine the flour, salt, and instant yeast. Stir together until well mixed. Add warm water and mix until a shaggy dough forms.
Cover the bowl with plastic wrap or a kitchen towel and let it sit at room temperature for 12 to 18 hours. The dough should double in size and be bubbly.
Flour a clean countertop and turn the dough out onto it. With floured hands, shape the dough into a ball and let it rest for 15 minutes.
Place your Dutch oven (with the lid) in the oven and preheat to 450°F (230°C).
Carefully place the dough into the hot Dutch oven, cover it, and bake for 30 minutes. Remove the lid and bake for an additional 15 minutes until golden brown.
Once baked, remove the bread from the pot and let it cool on a wire rack before slicing.
Extra Tips
- For extra flavor, consider adding herbs or cheese to the dough. Make sure to use a kitchen thermometer to check if your bread is fully baked
- it should register about 200°F (93°C) internally.
Nutritional Breakdown (Per Serving)
- Calories: 200 kcal
- Total Fat: 1g
- Saturated Fat: 0g
- Cholesterol: 0mg
- Sodium: 500mg
- Total Carbohydrates: 44g
- Dietary Fiber: 2g
- Sugars: 0g
- Protein: 6g